
Strikeborn Air Combo Guide
Uppercut confirms, follow-up timing, and the wall jump extensions that separate lab routes from real fights.
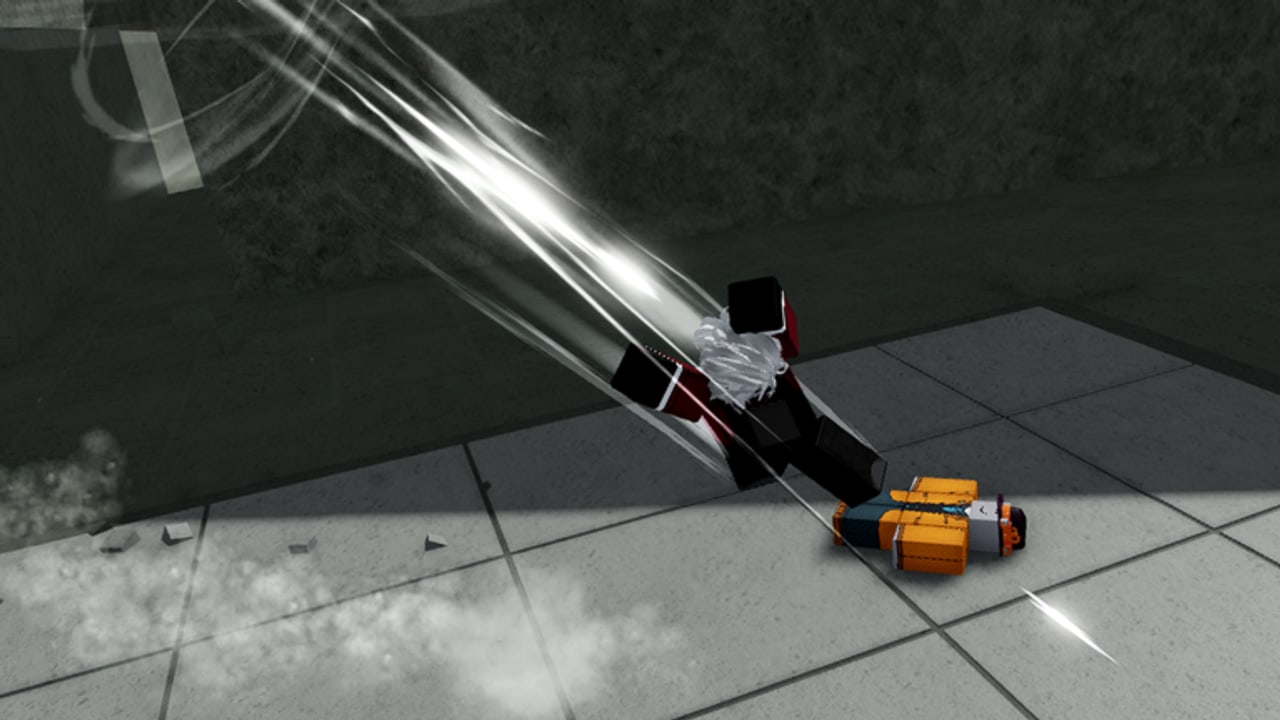
Air combos are the identity of Strikeborn. The moment a grounded M1 string produces an uppercut instead of a down slam is when this game stops being a generic battlegrounds clone and starts being something worth learning. This guide is a structured breakdown of how air combos start, how to extend them, and when to stop them.
Pair this with the combat page for the shared theory layer, and with movement for wall jump and pad mechanics that interact with air routes.
Why air combos matter more here than in other games
Most Roblox fighting games treat air combos as a bonus feature — something you can do after a confirm, but not the primary damage path. Strikeborn treats air differently:
- The uppercut is in hit three, not hit four. That means you convert upward earlier than you expect coming from TSB or JJS.
- Air routes carry your target. You are not juggling一个人 in place; you are moving them with you toward walls, pads, or the ravine.
- Dashes are a resource, not a walk button. Using one to confirm an air route is the correct use. Using one to commute across the map is not.
The players who look untouchable in Strikeborn are not running longer combos. They are starting air routes faster and using the map to extend them.
How an air combo actually starts
The foundation is the same for every character: land the uppercut hit, then follow immediately.
Step 1: Confirm the uppercut hit.
In the M1 string (hit one, hit two, hit three = uppercut, hit four = down slam), you need hit three to land. If you auto-complete the string expecting a pop-up, you will bury the opponent and lose the route. The single most important habit in Strikeborn is learning to stop the M1 string on hit three.
Step 2: Follow immediately.
After the uppercut connects, press jump or dash while the opponent is still rising. The follow must arrive in that window — not after they have peaked and started to fall, not after they have recovered. The timing window is tight. A 10-minute dummy practice session will give you the feel faster than any written description.
Step 3: Use one aerial skill you have already tested.
Several slots have different air versions. Do not test a new air variant for the first time in a real fight. Lab each skill in the air before you need it in a match.
Step 4: If you still have height, M1 again. If you are about to hit the boundary, exit.
Pride combos kill. A 15-hit air route over the waterfall is a dinner bell for every third party in the lobby. Take two extra hits and dump them toward the mist. A stock is worth more than a clip.
Direction variants and air versions
Test builds showed different behavior for skills depending on air versus grounded, and on which direction you hold. This means every slot is effectively two or more tools.
The practical lab method for every character:
- Neutral, grounded: press slots 1-4. Note which are launchers, counters, movement tools, or finishers.
- Jump, neutral: press slots 1-4. Compare to grounded.
- Jump, hold forward: press slots 1-4.
- Jump, hold back: press slots 1-4.
- After uppercut, mid-air: repeat all holds.
Write down anything that changes. One Yuji clip treated a kick as both a counter and a normal. One Guts clip treated slot 4 as a counter if it hit an attack, and a normal swing if it did not.
Wall jump extensions
Wall jumps are the single most powerful extension tool in Strikeborn. After an uppercut convert, touching a wall and jumping again keeps you in the air when the opponent expects you to land.
How to execute:
- Confirm the uppercut.
- Dash or jump with the opponent toward a wall surface.
- Touch the wall with a jump available.
- Hold the direction away from the wall and press jump again.
- Continue your aerial M1 or skill sequence.
The waterfall map has enough vertical space that wall jump extensions are a practical option in most real fights, not just lab scenarios.
Jump pad launches
Jump pads give you height, and height changes the opponent’s response options. A pad launch into an air M1 can catch players who expect you to be on the ground.
How to use pads in a combo:
- Confirm a grounded hit.
- Position yourself near a pad, or push the opponent toward one.
- Hit the pad, then press M1 or a skill as you launch.
- The opponent now has to respond to you from above, which limits their options.
Knowing pad locations before a fight starts is the difference between using them and stumbling onto them. Walk the map once with Getting Started and mark the pad positions.
Yuji air combo example
The Yuji kit is the most air-combo-friendly in the current roster. His M1s are faster, which makes the uppercut confirm easier, and his aerial follow-ups are designed to convert.
A basic Yuji air route:
- M1 string into uppercut (hit three).
- Dash or jump immediately after the uppercut.
- One aerial M1 while they are still rising.
- If you have height and they are still airborne, a second M1 or a skill.
- Exit via wall jump or let them fall toward the ravine.
The uppercut convert is the foundation. If it does not connect, none of the rest of the route happens. Practice landing hit three specifically before you practice the follow.
The 30-minute practice routine
- 20 grounded M1 strings where you stop on hit three and do not auto-complete hit four.
- 20 uppercut converts into one aerial M1. Focus on the timing of the follow, not the length.
- 10 wall jump extensions after uppercut converts. The wall jump must happen while they are still airborne.
- 10 pad launches that start a fight or continue one. Mark whether the pad gives you enough height to be useful.
- Each skill slot: grounded, air, hold-forward, hold-back. Write down what changed.
After 30 minutes, you will have the muscle memory for the foundation. The character-specific routes come after you can do these five things without thinking.
When to stop
The biggest mistake new players make with air combos is overextending. In a 100-player lobby, an air combo is visible from across the map. The longer the route, the more likely a third party is already on their way.
A practical rule: if your route requires more than two inputs after the air M1, consider whether a wall jump or pad launch would extend it more safely than a third aerial M1.
If the opponent is near the ravine lip, a down slam (hit four) is often better than an air route. Edge guarding is a valid finish.
Related pages
- Combat — M1 theory, counters, and the shared fighting layer.
- Movement — dashes, wall jumps, and pad mechanics.
- Yuji guide — Yuji-specific air combo habits.
- Guts guide — Guts-specific air combo habits.
- Variants — air variants and direction-hold tech for every slot.
- Starter picks — which character to learn air combos on first.
Frequently Asked Questions
Quick answers for Strikeborn early-access players.
Which hit of the M1 string is the uppercut in Strikeborn?
Hit three. Hit four is a down slam. This is the opposite of some other battlegrounds titles where the fourth hit is the launcher.
How do I start an air combo?
Land the uppercut hit (M1 hit three), then follow immediately with jump or dash while the opponent is still rising. Use one aerial skill you have already tested.
What's the most common mistake in air combos?
Auto-completing the M1 string to hit four when you wanted to convert upward. The second mistake is overextending in a 100-player lobby where third parties will steal your kill.
Can I extend air combos with wall jumps?
Yes. Touch a wall with a jump available, hold away from the wall, and press jump again. This keeps you in the air when the opponent expects you to land.
Which character is best for learning air combos?
Yuji is the smoothest entry because his M1s are faster and the confirm window is more forgiving. Guts has more range but slower swings. See starter picks for device-specific advice.